
If you are anything like me, you admire the patience and skill of book binding artists. Maybe you’ve even dipped your toes into creating some easy beginner projects.
As a novice book binder, (and a person with ADHD) one thing that always kills my motivation to learn new skills is the time consuming nature of the craft. Sometimes you just want to make something beautiful quickly.
This week’s project is not only beginner-friendly, it’s the perfect dopamine boosting craft to restore your inspiration and explore new techniques.

Let’s get started!
What you’ll need:
-
Cricut Machine ( I use the Explore Air 2)
-
A Three Hole Punch Page “Image” or template from Cricut Design Space
-
Crafting Glue Stick
-
Kraft Cardstock
-
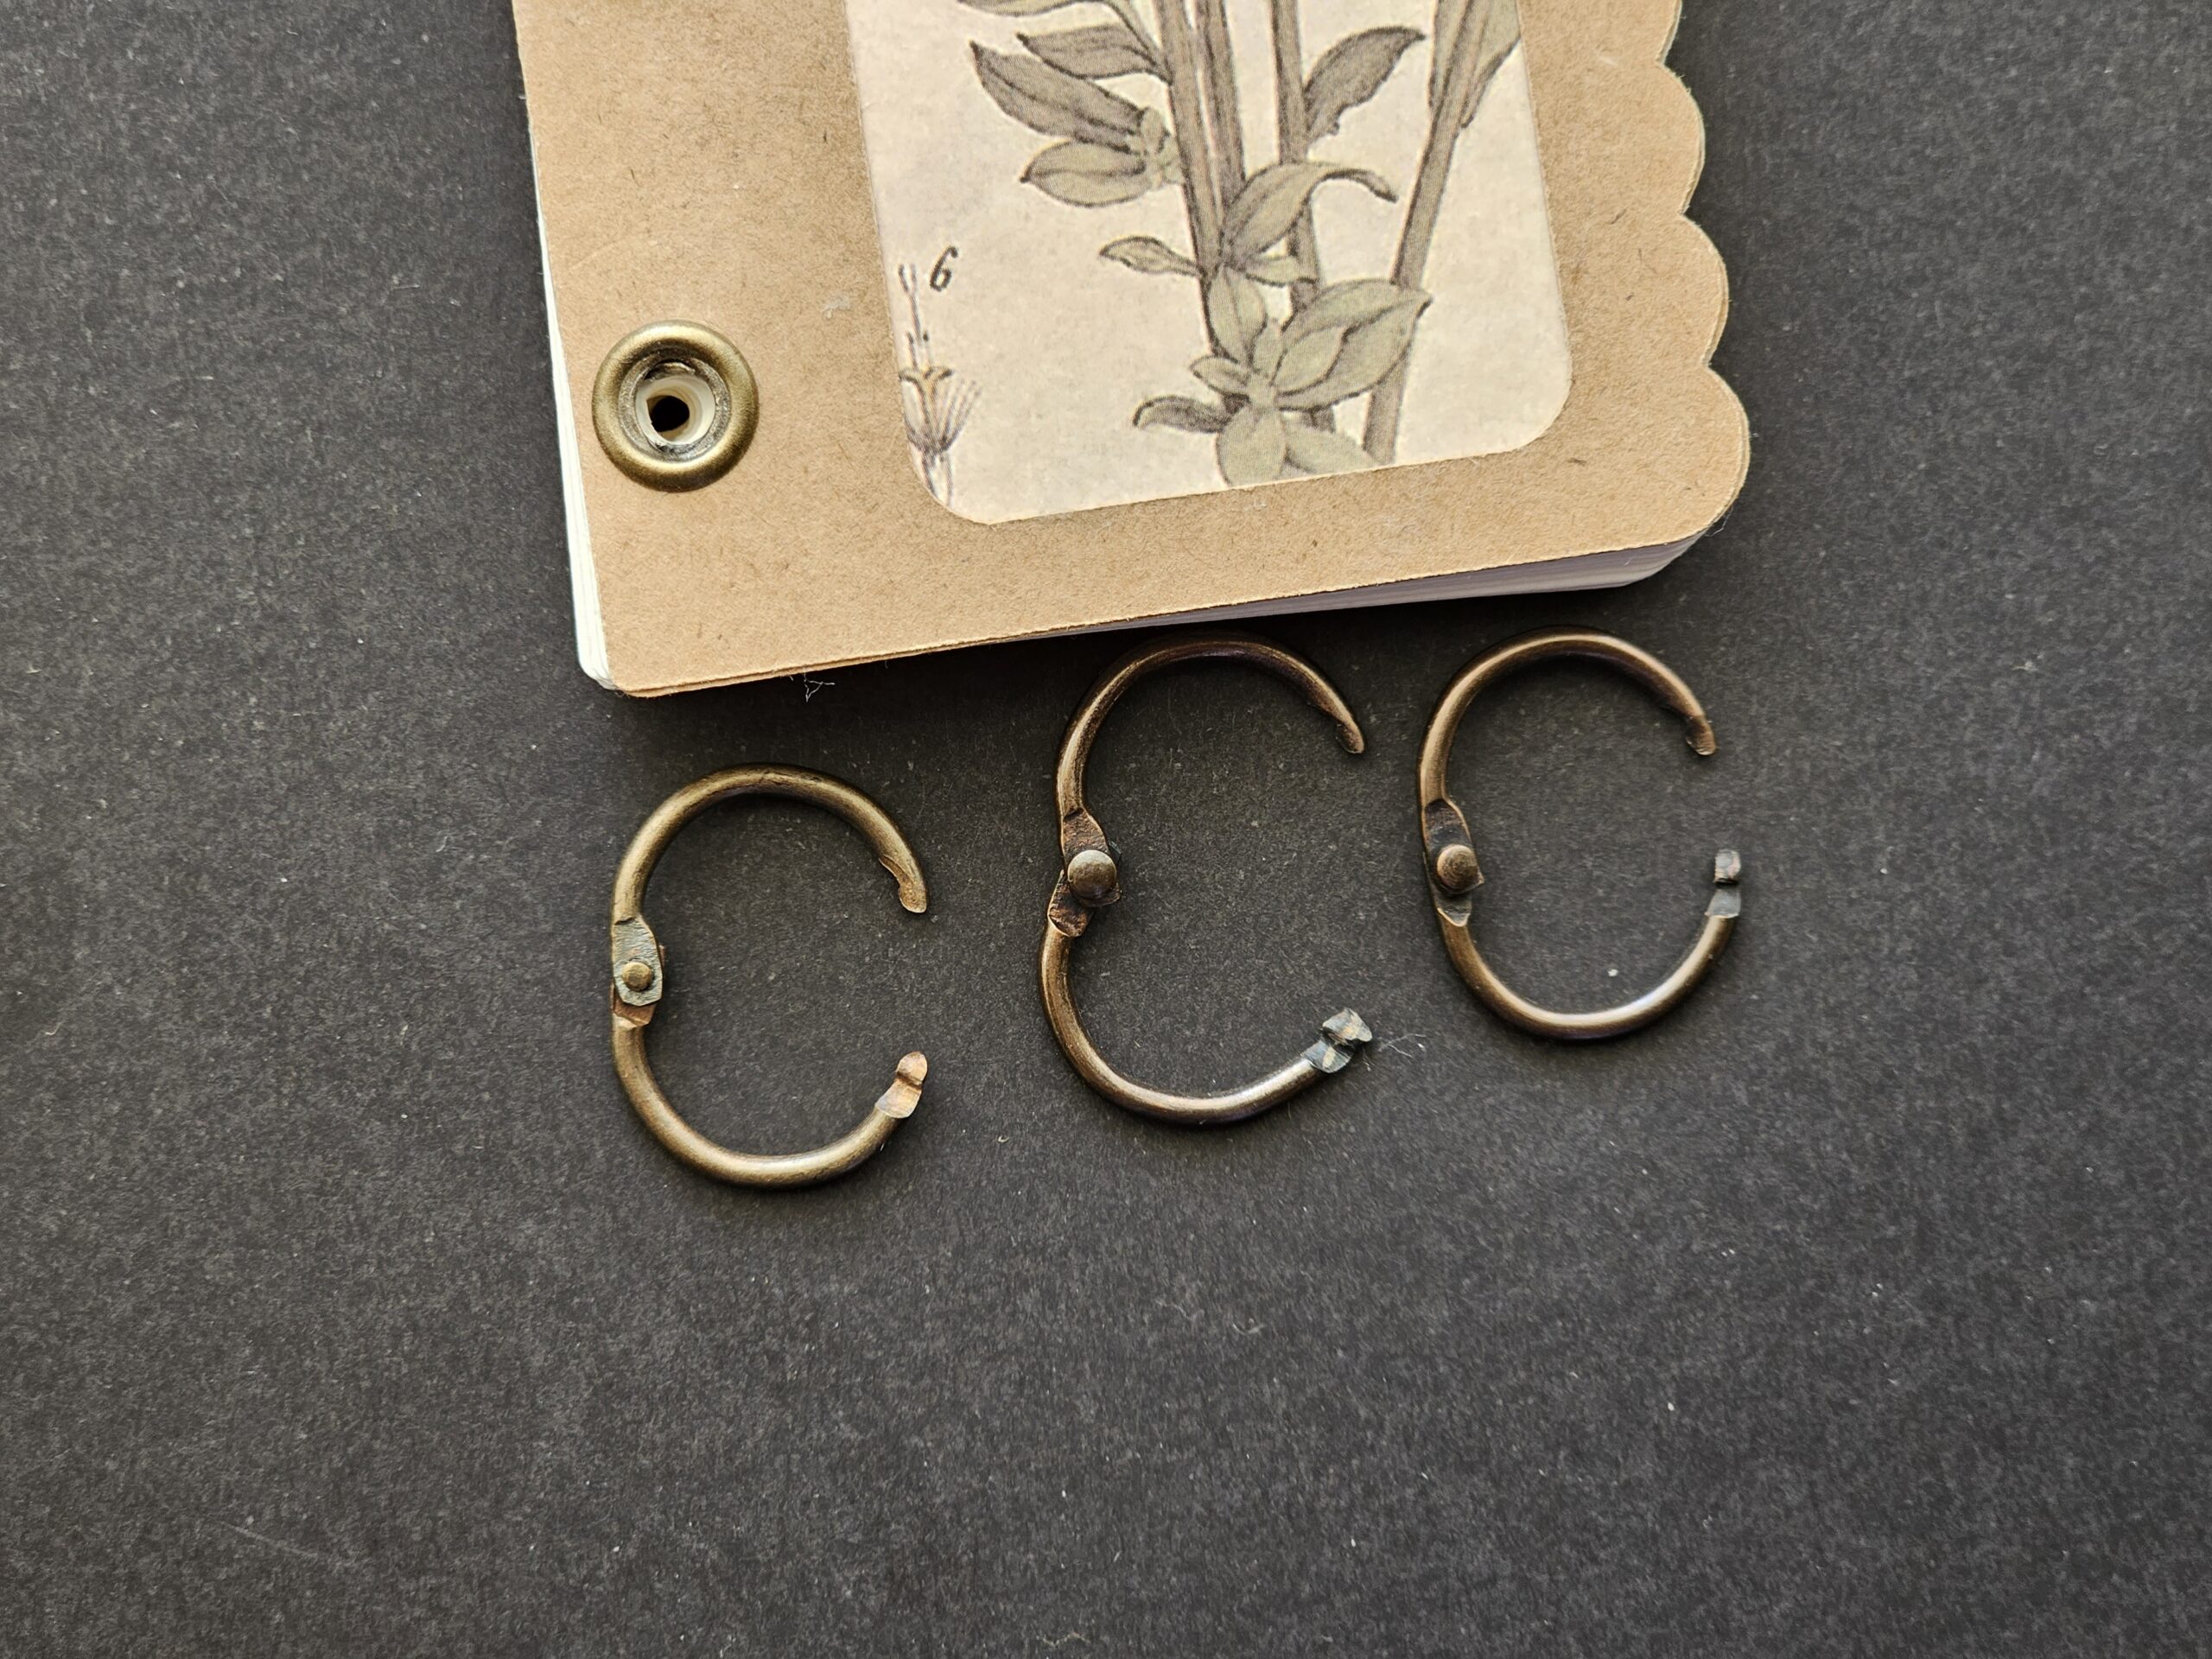
4mm Eyelets (any color)
-
15mm Binder Rings
-
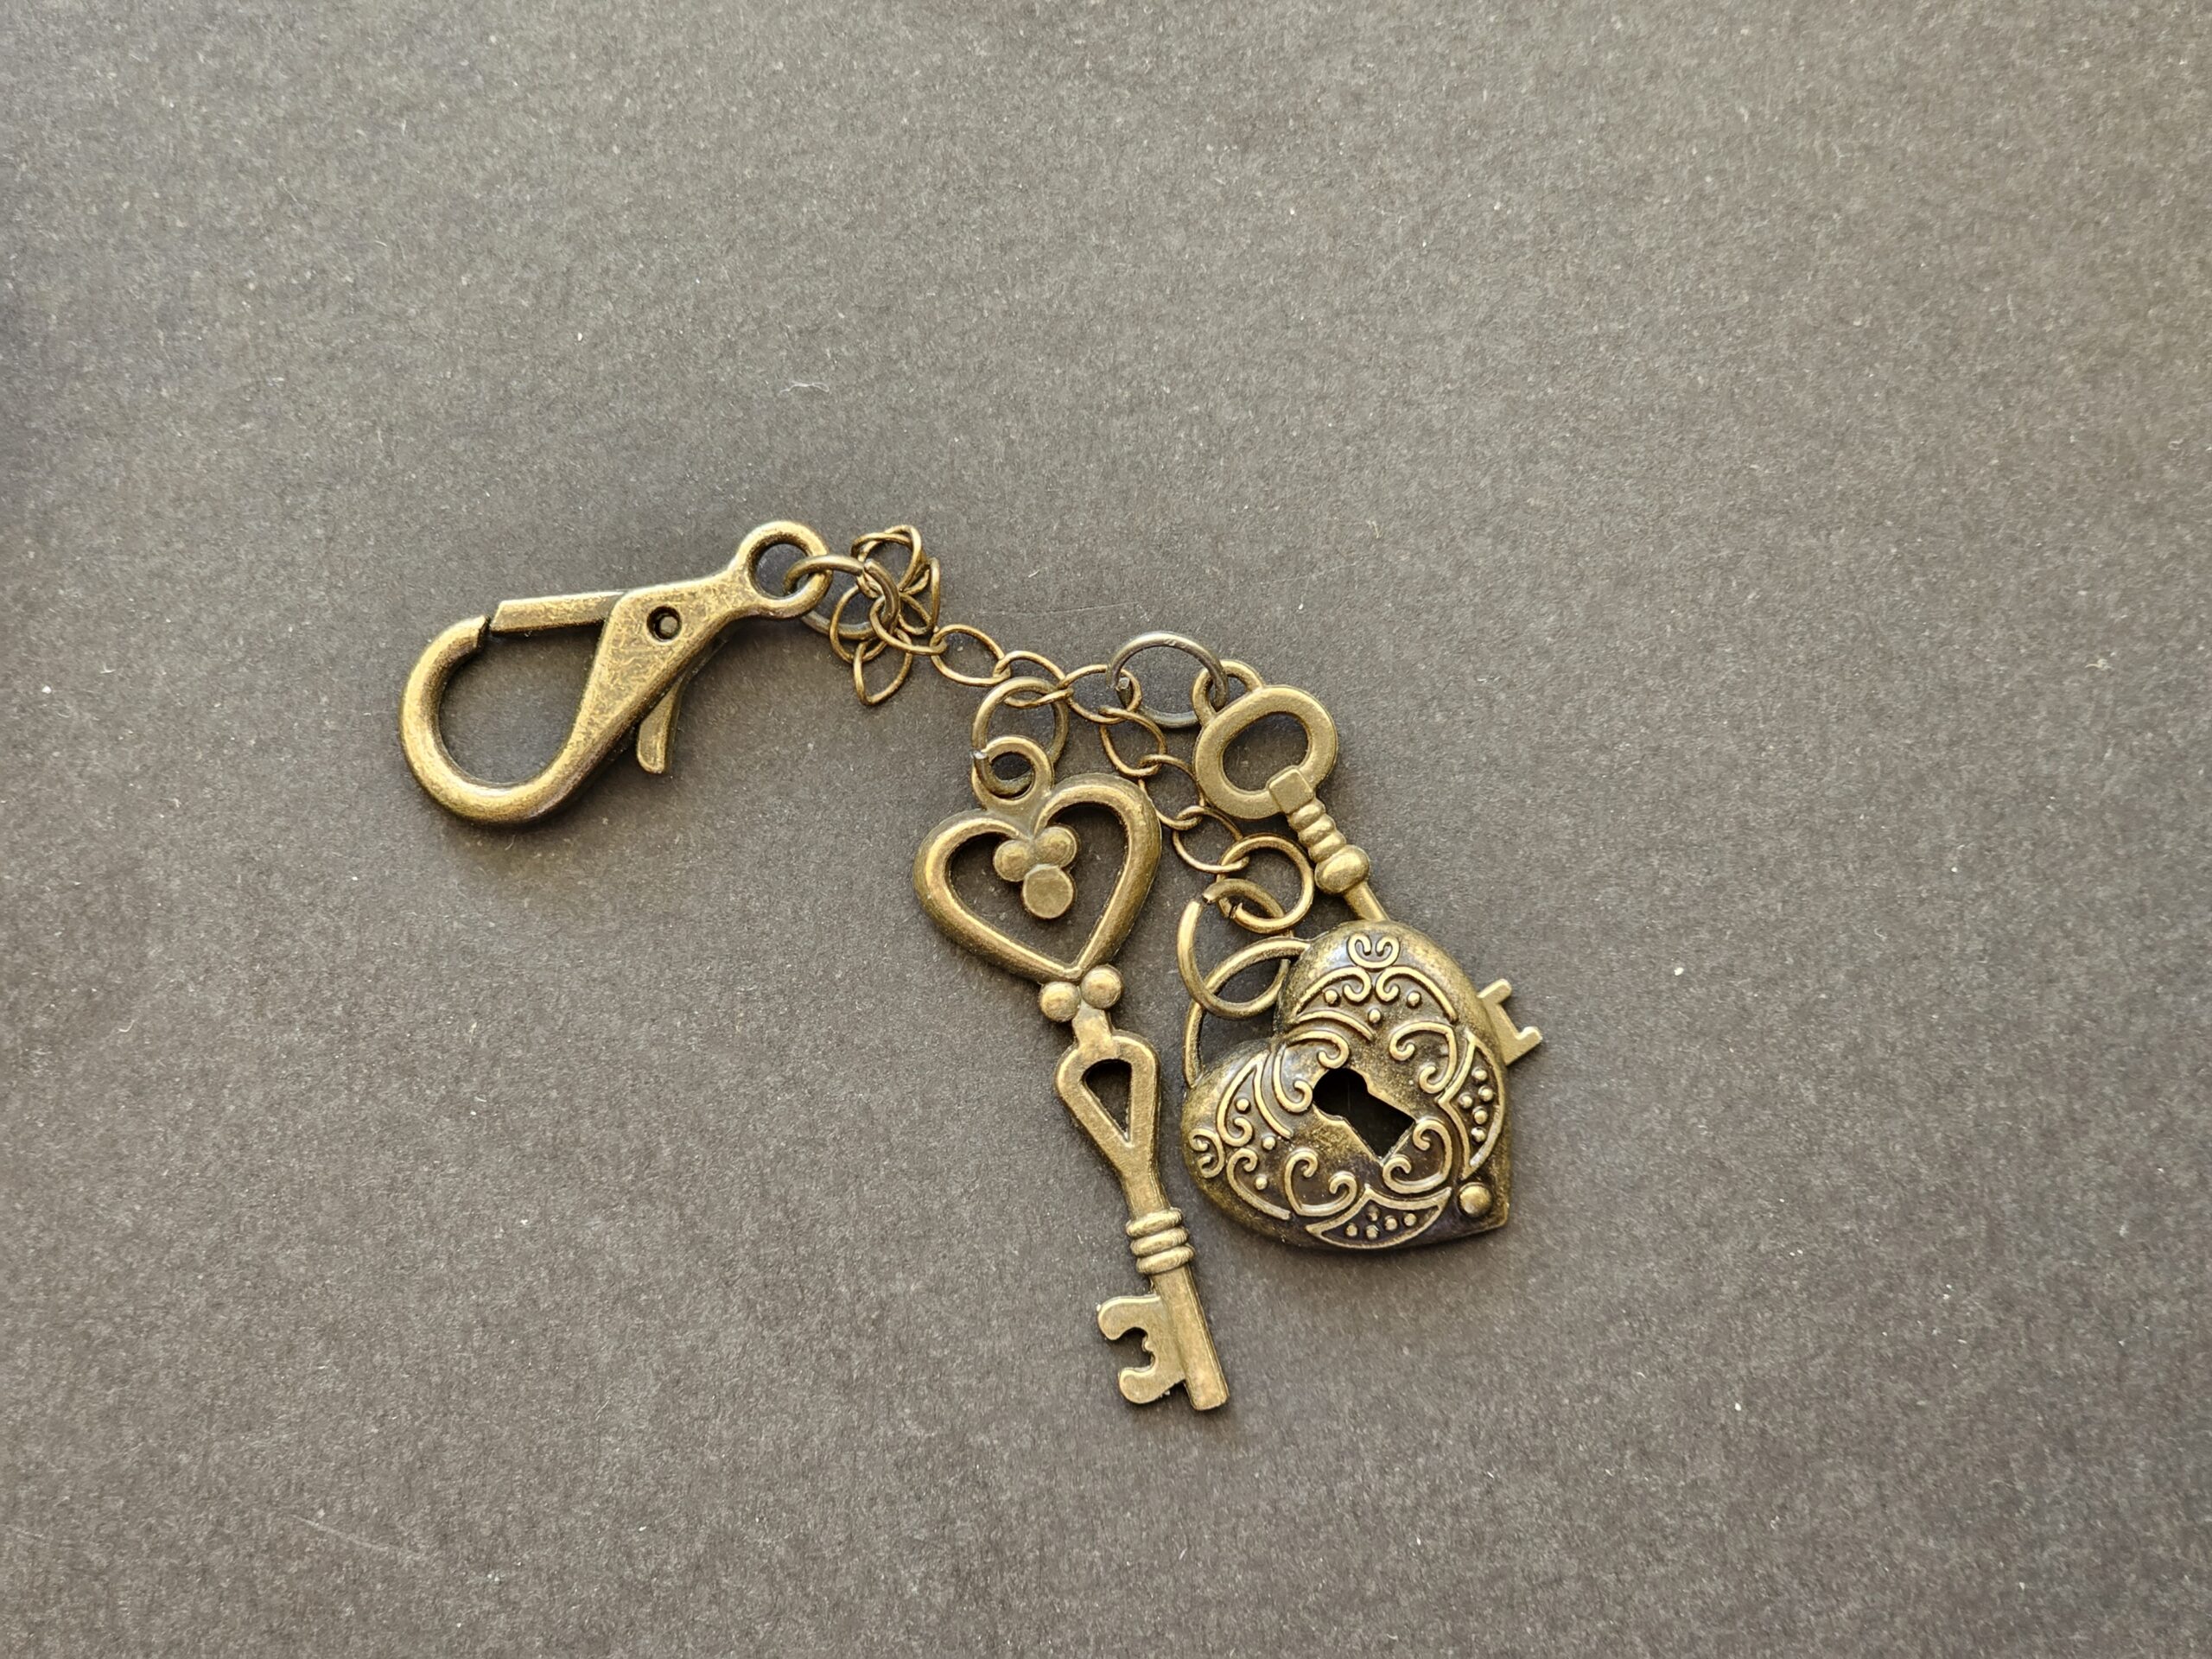
Key Ring Or Keychain (optional)
-
Watercolor Paper ( large pages preferably)
-
Art prints or ephemera, stickers etc. (Optional: These can be added as a peekaboo cut out image, or glued onto the cover for decoration.)
-
Crop-a-Dile, Grommet Pliers or, a Grommet setting kit.
Step 1: Create Your Pages
Open up Cricut Design Space and start a new project. Navigate to “Images” and search “page divider”.

You’ll see an array of pre-punched pages you can use as the cover and inside pages of your book. Choose a design that you like the shape of.


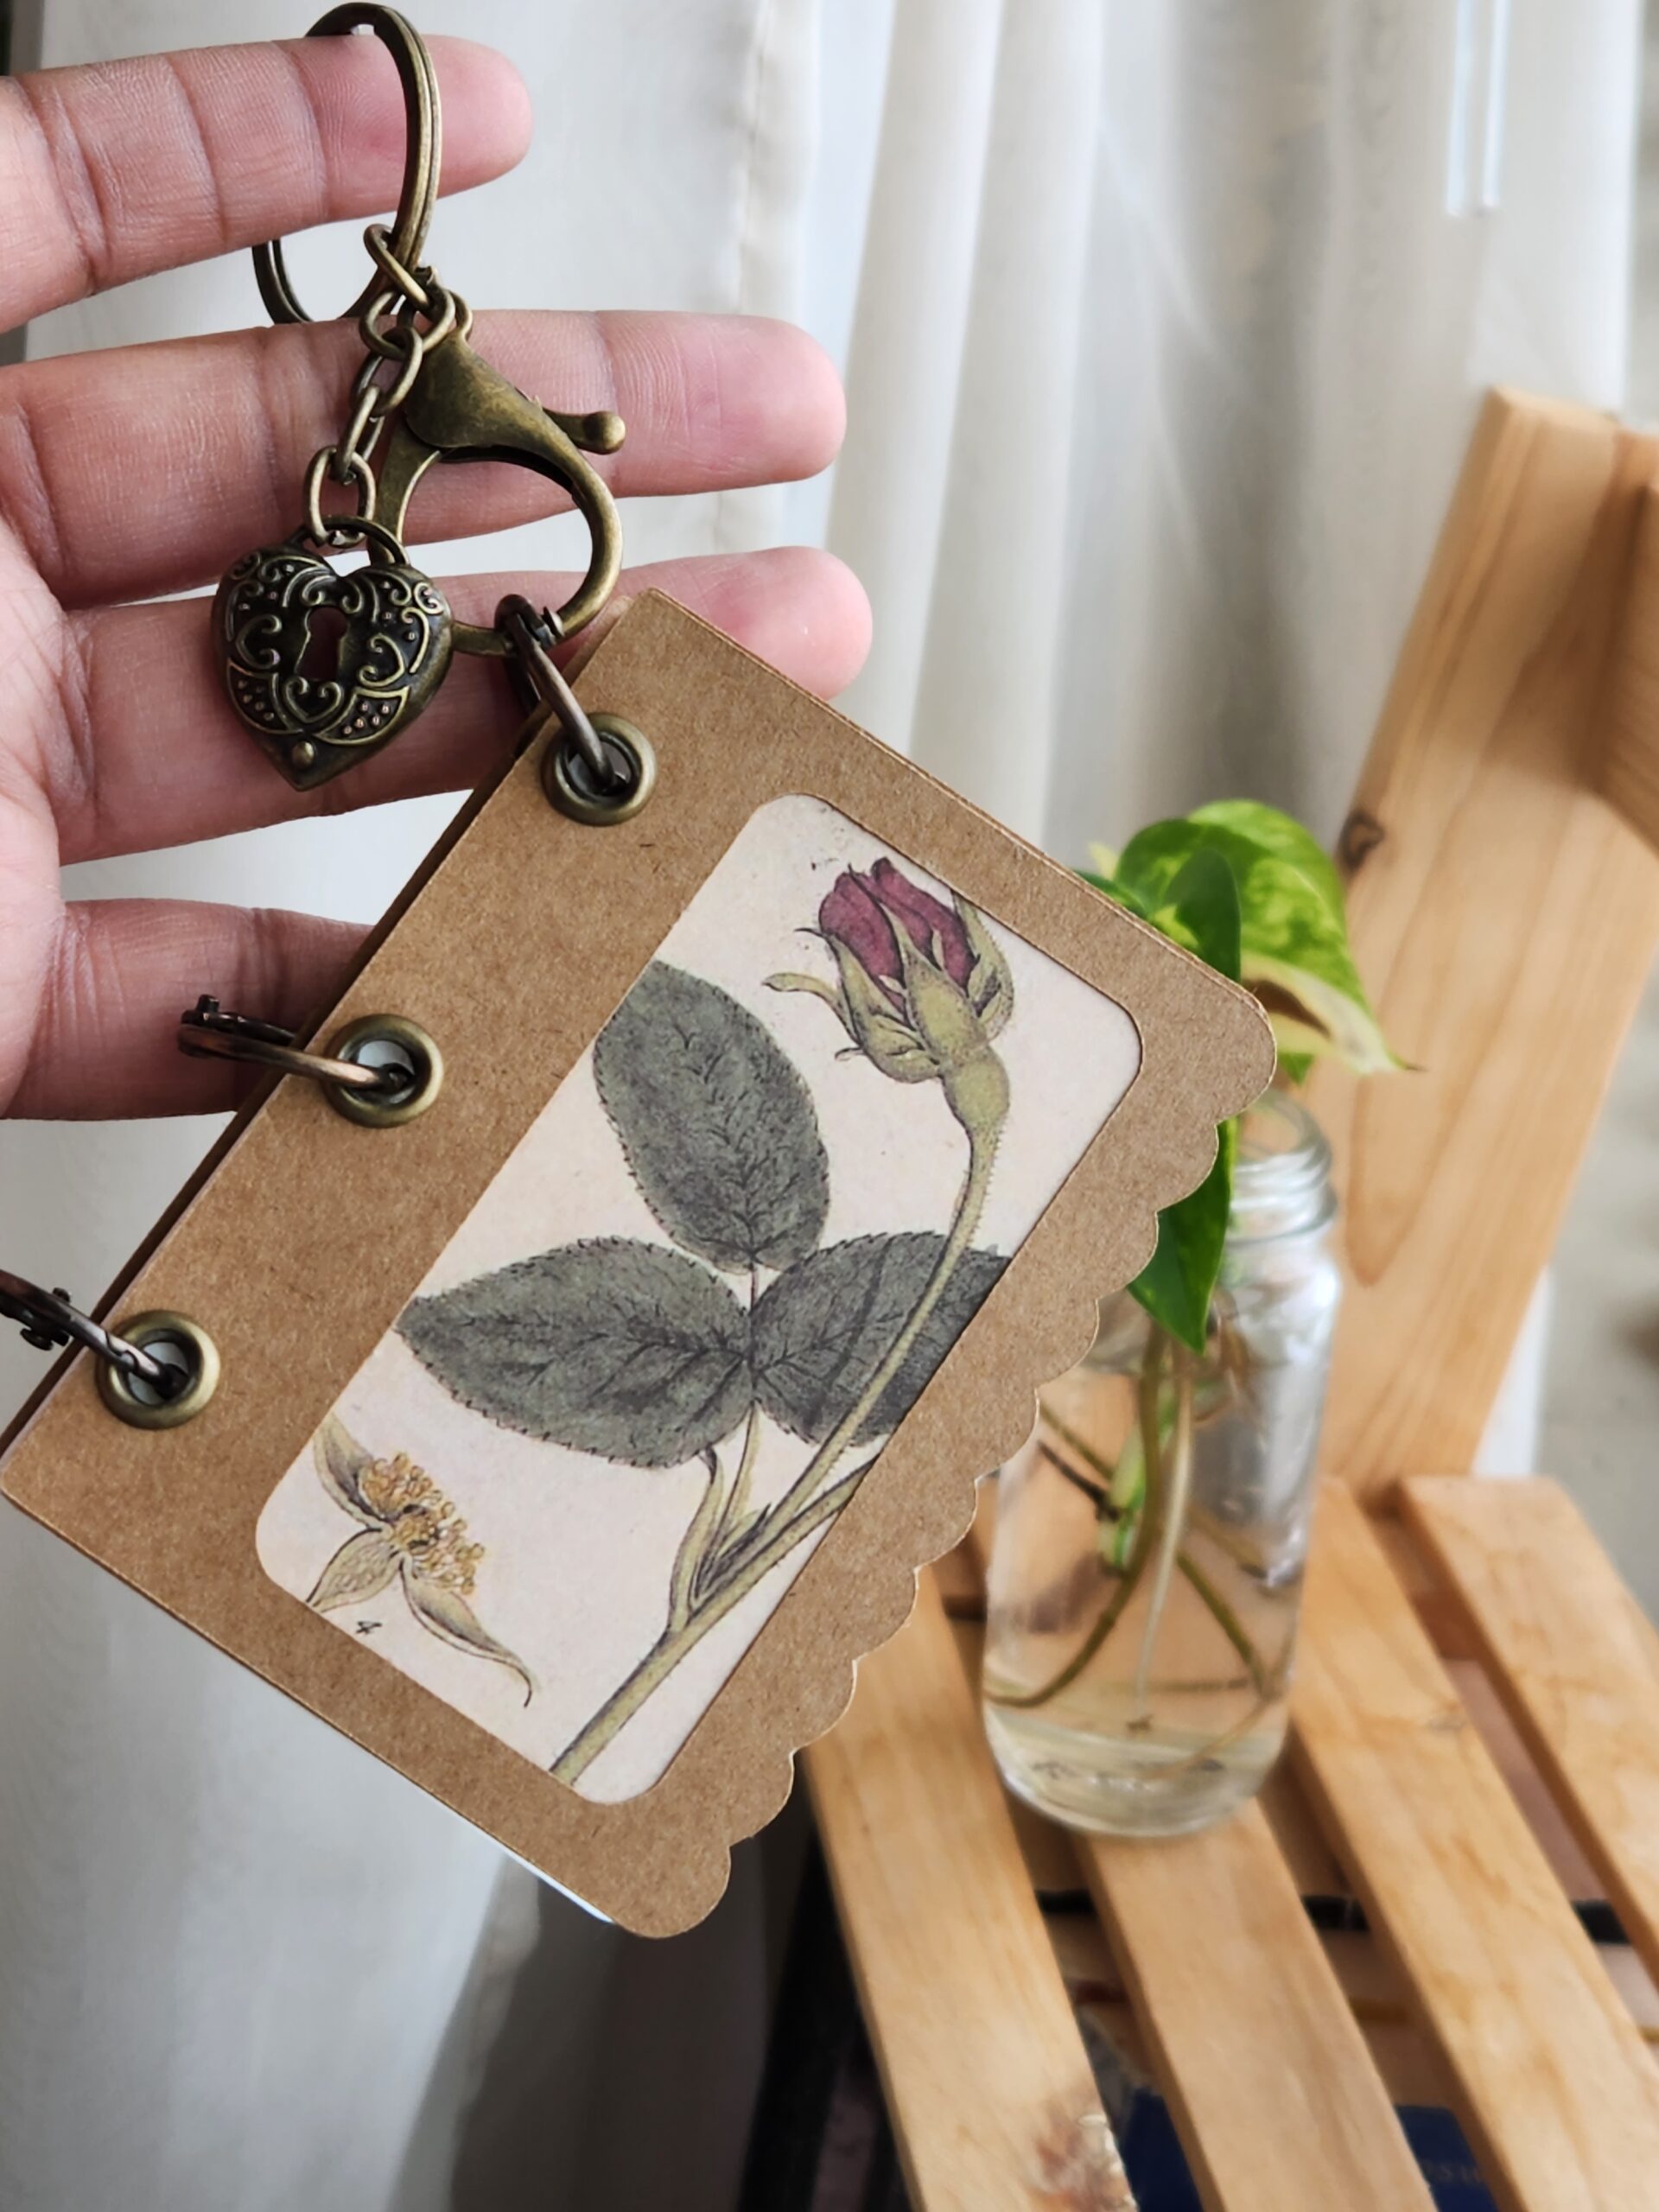
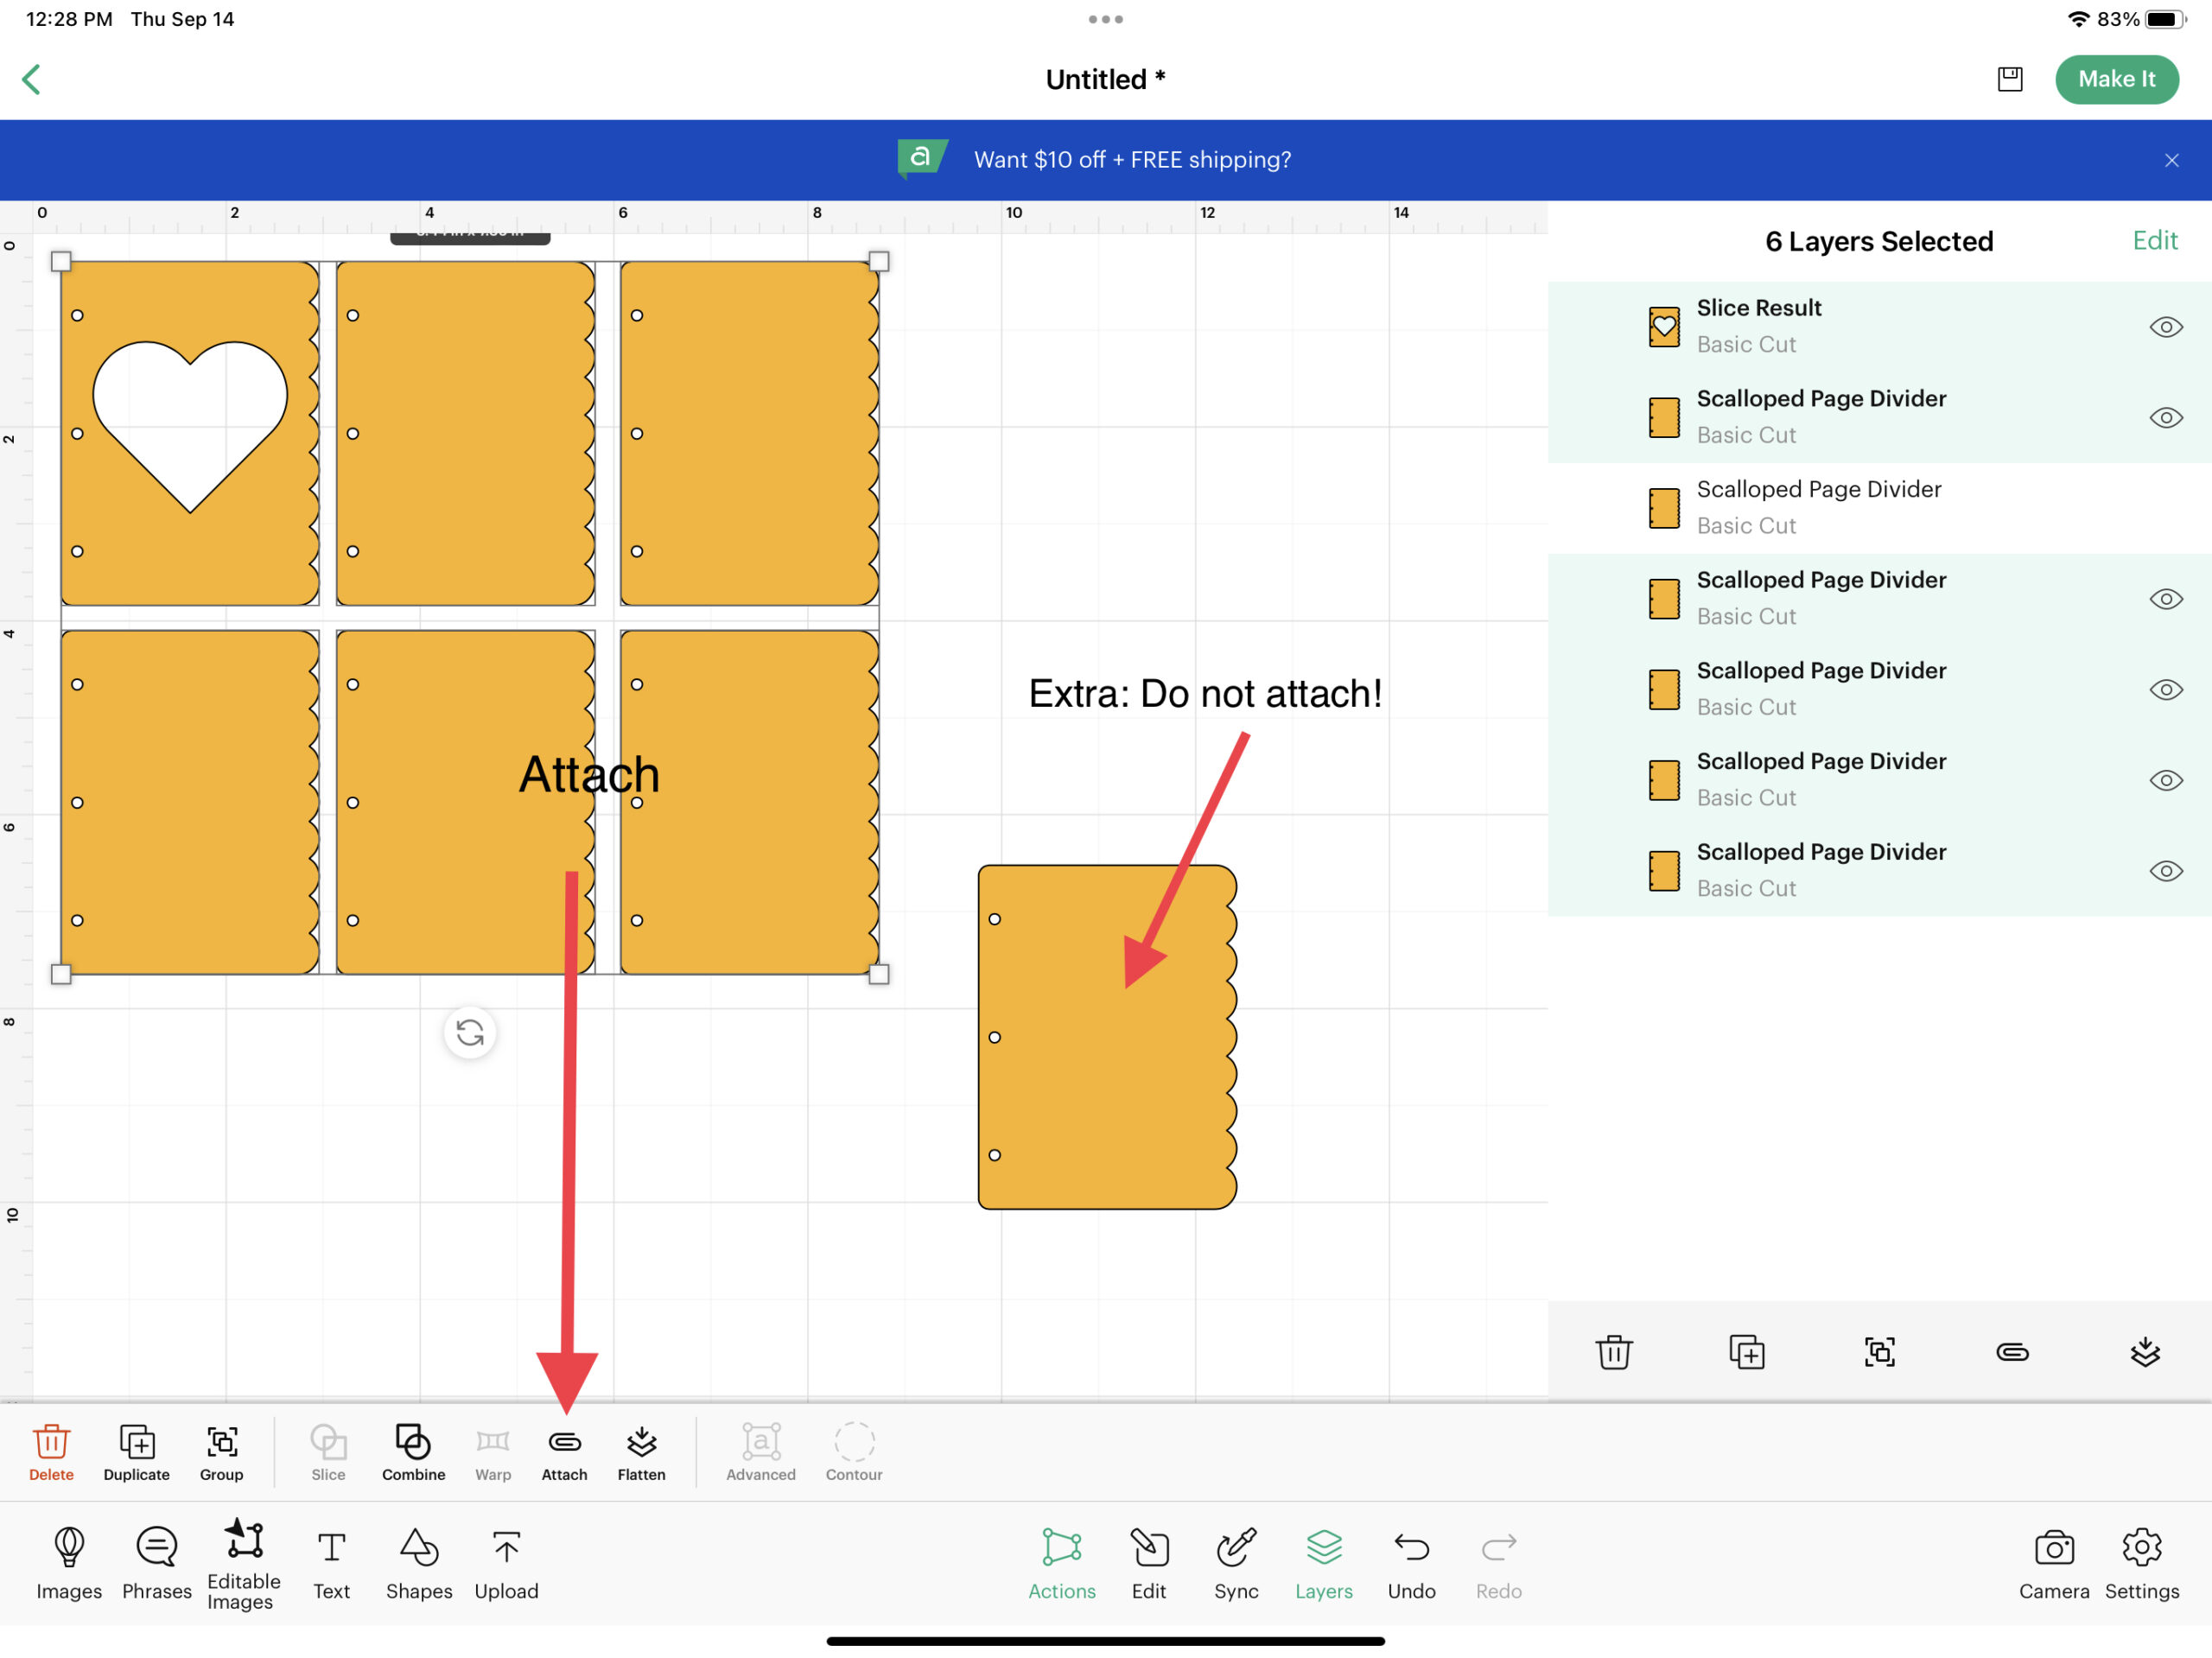
To create a book with a peekaboo art print like my reference photo, add a cut out to one of your cover pages. Make sure to duplicate the image before adding the cut out to one of them.
Use the “shapes” button to find squares, hearts, circles or rectangles. This is your preference. Place the cut out shape over one of the duplicated divider pages, highlight, and “slice” them. Delete the excess.

I recommend duplicating your cover pages several times. This will give you extras for future books, or allow you to have blank backing pages to sandwich your art between with your peekaboo cut out overlay.
Highlight and attach all of the pages. Be sure that the size of your project will fit your kraft cardstock. Make sure to duplicate the non peekaboo page once more but don’t attach it to the other pages. (This will be for your inside pages)
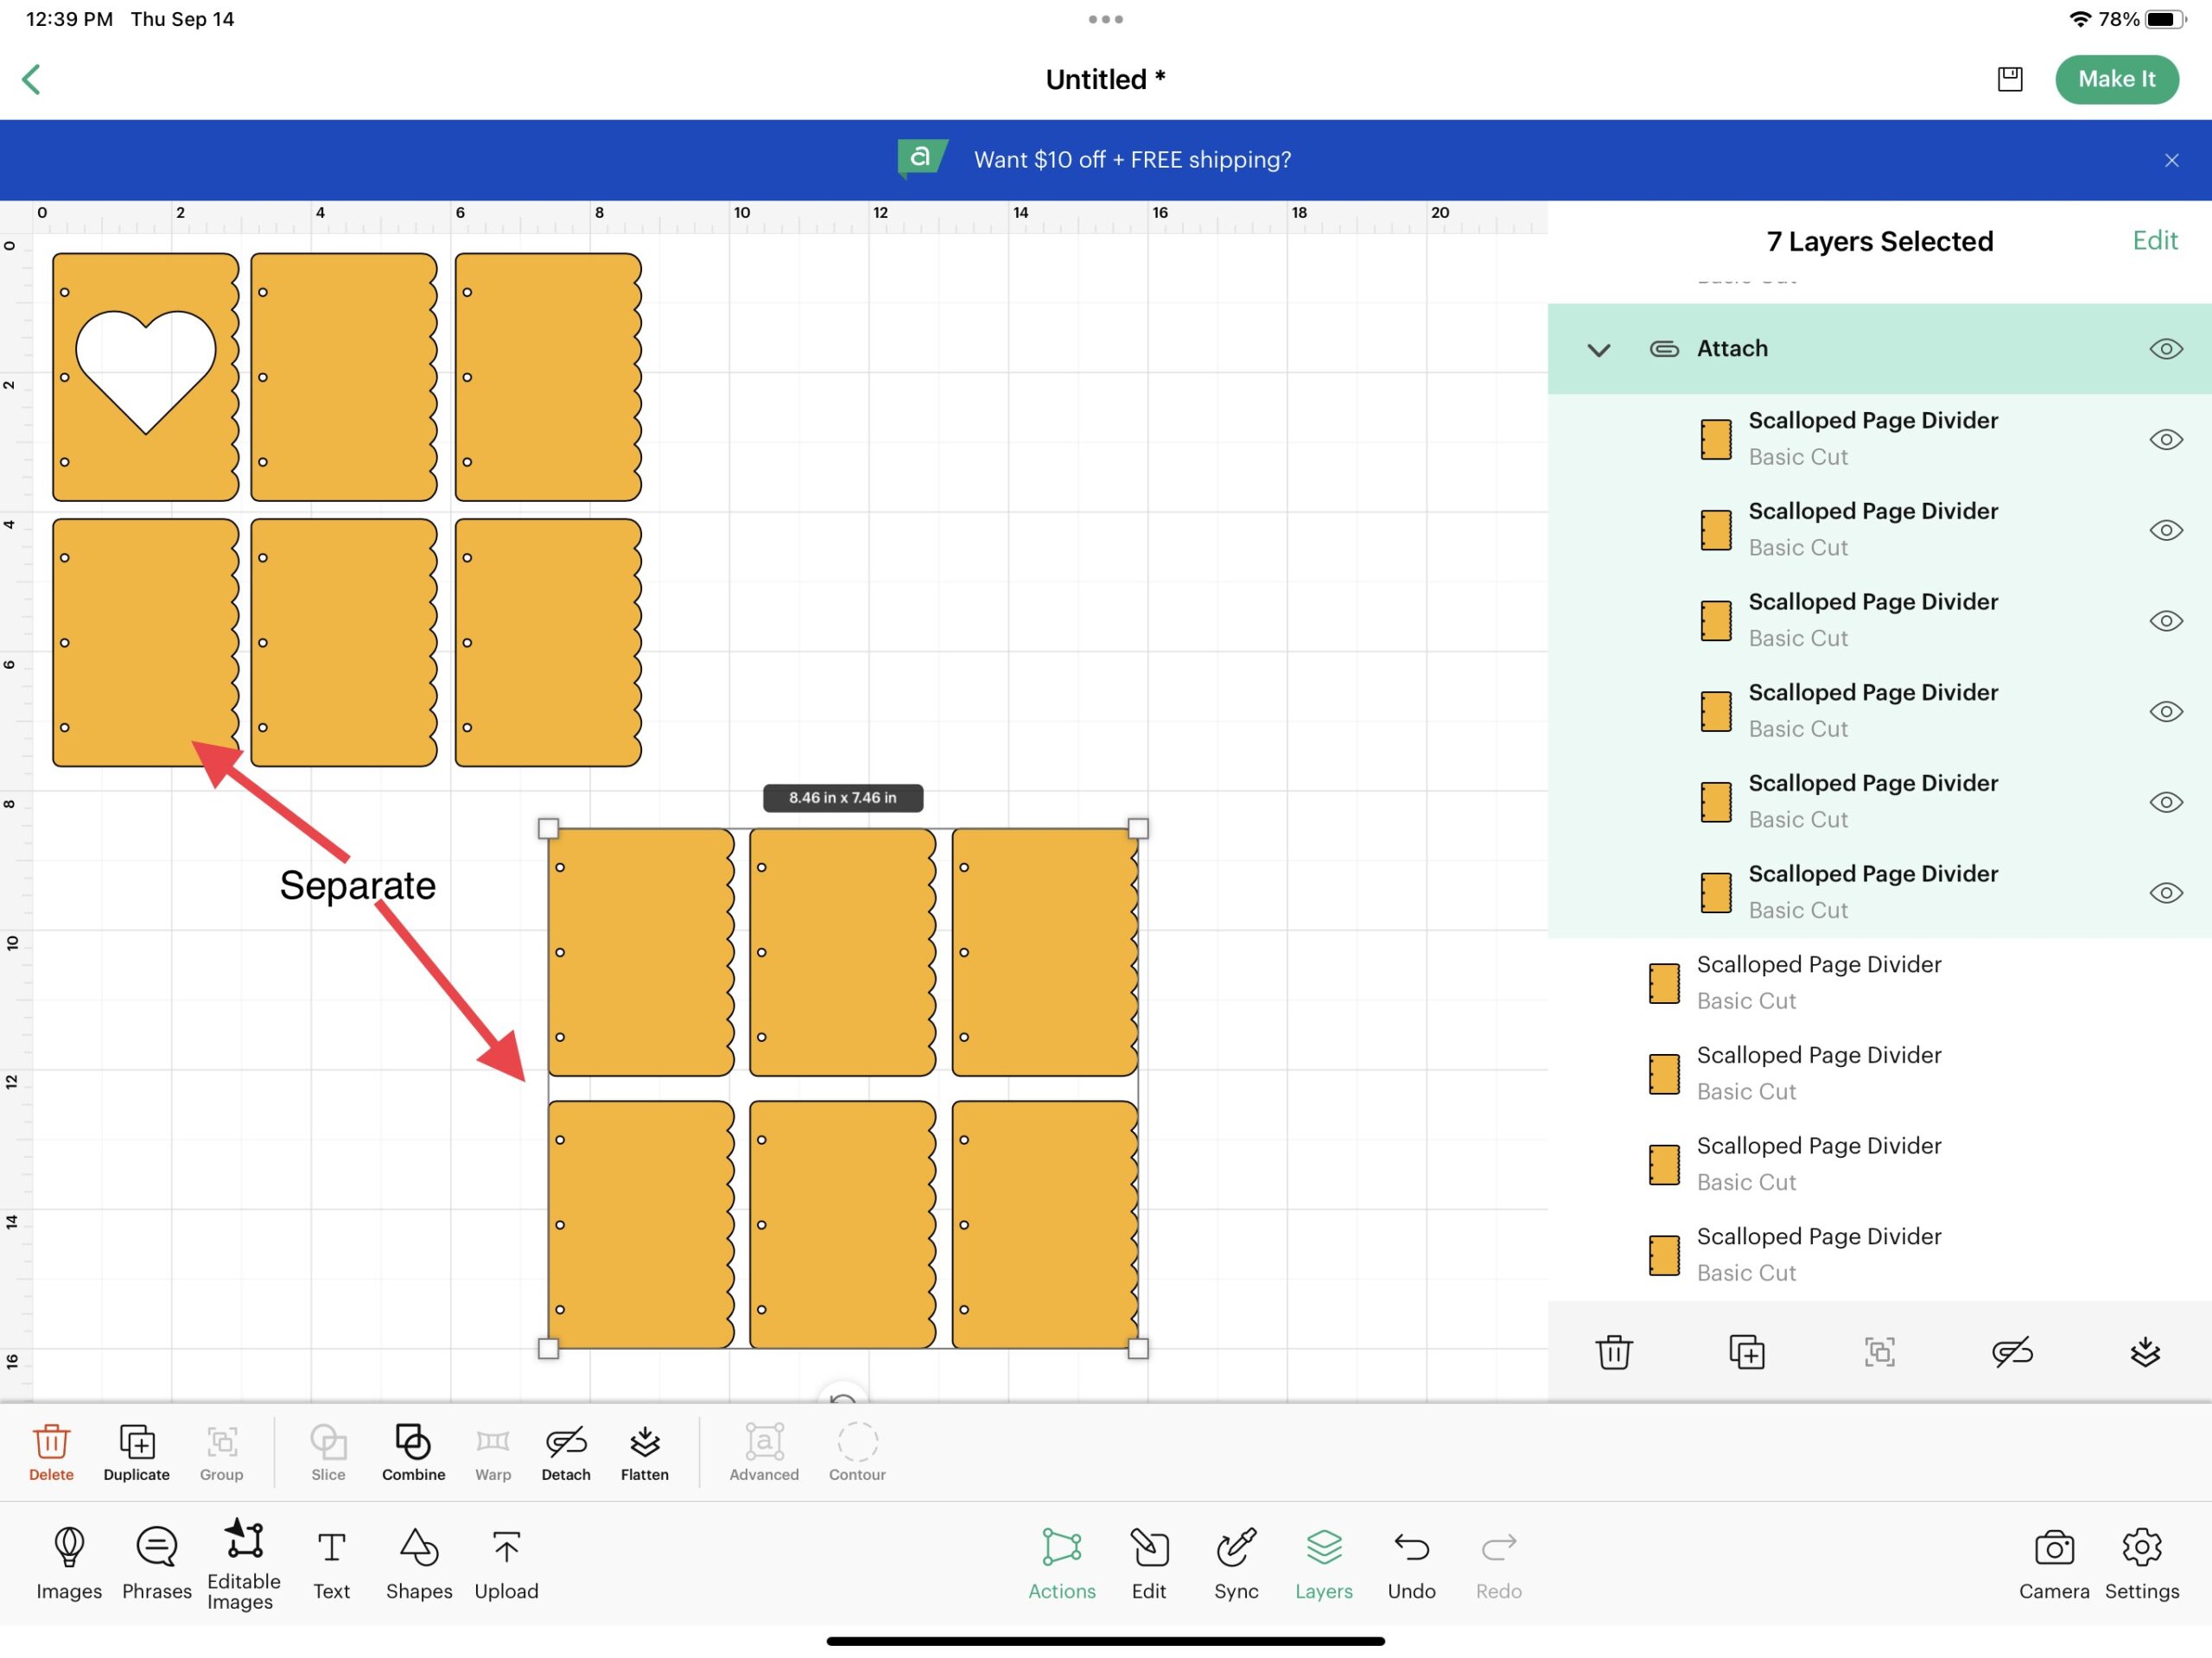
Step 2: Create Inside Pages
To create the watercolor pages, duplicate the blank page as many times as will fit on your watercolor pages. Attach those to one another separate from the cover pages.
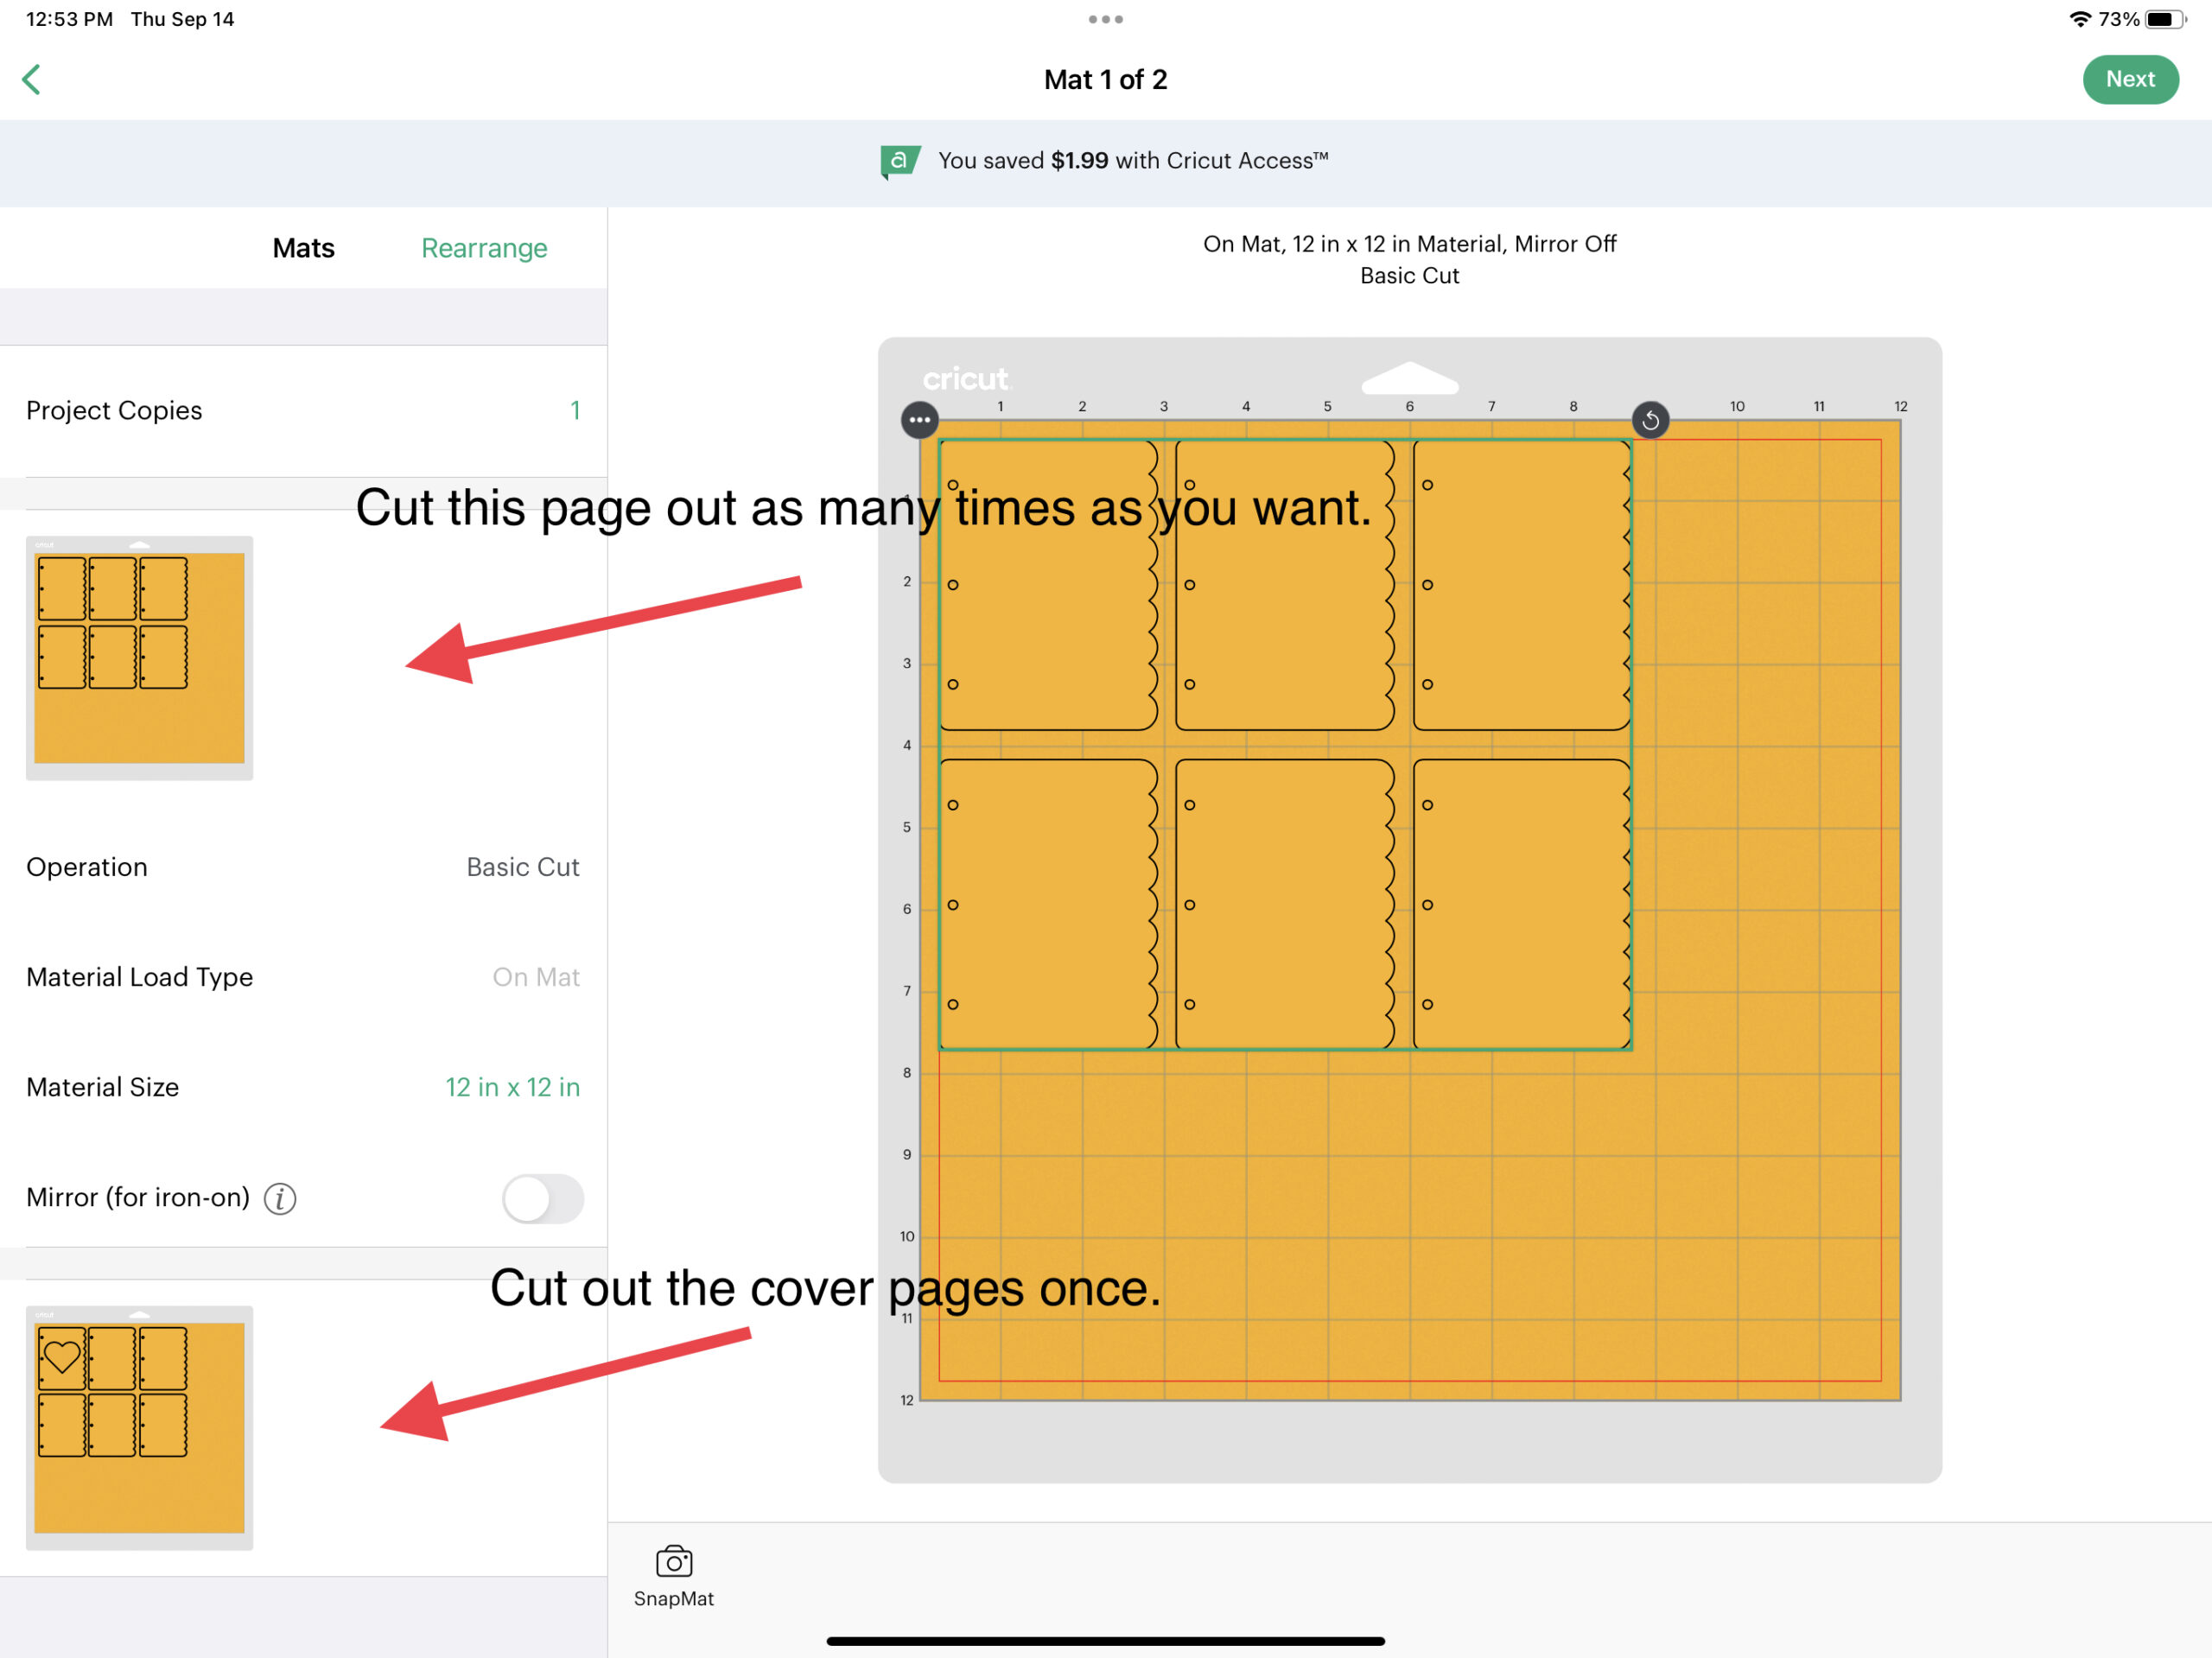
Click on “Make It”.

You’ll see that Design Space has separated your project into pages. Cut out the cover pages on kraft cardstock once.
Cut out the inner pages on the watercolor paper (as many times as needed to fill your book). You will need to keep cutting out the inner pages until you have enough to fill your book aesthetically. This will take a while, but you can use the break to prepare for assembling your book.
Step 4: Assemble!
Once your pages are cut out, this is optional, but you can glue two cover pages (once for the front cover, and once for the back cover) together to make them thicker and reinforce them.
This would also be the time to find or print out your peekaboo art if you decided to add a cut out. Add whatever art you want. I recommend perusing Artvee.com for public domain prints. That’s where I found the beautiful botanical rose print in the project photo. Trim your art to keep it from sticking out between the two kraft paper pages. Glue them together.
Add your grommets depending on the type of grommet setting you possess. A crop-a-dile from We R Makers makes this extremely easy.
You will need one grommet and washer for each hole. Your result should look something like this:

I used a grommet setting kit for this one, and I think my results with the crop-a-dile are much neater.
Once your grommets are set, you can assemble your book with the binder rings!
Step 5: OPTIONAL: Add a lobster style keychain to your book to turn it into a travel notebook or bag charm!
I hope you’ve enjoyed this tutorial. For a visual step-by-step guide, check out my YouTube video below!